Awesome Info About How To Draw By Steps
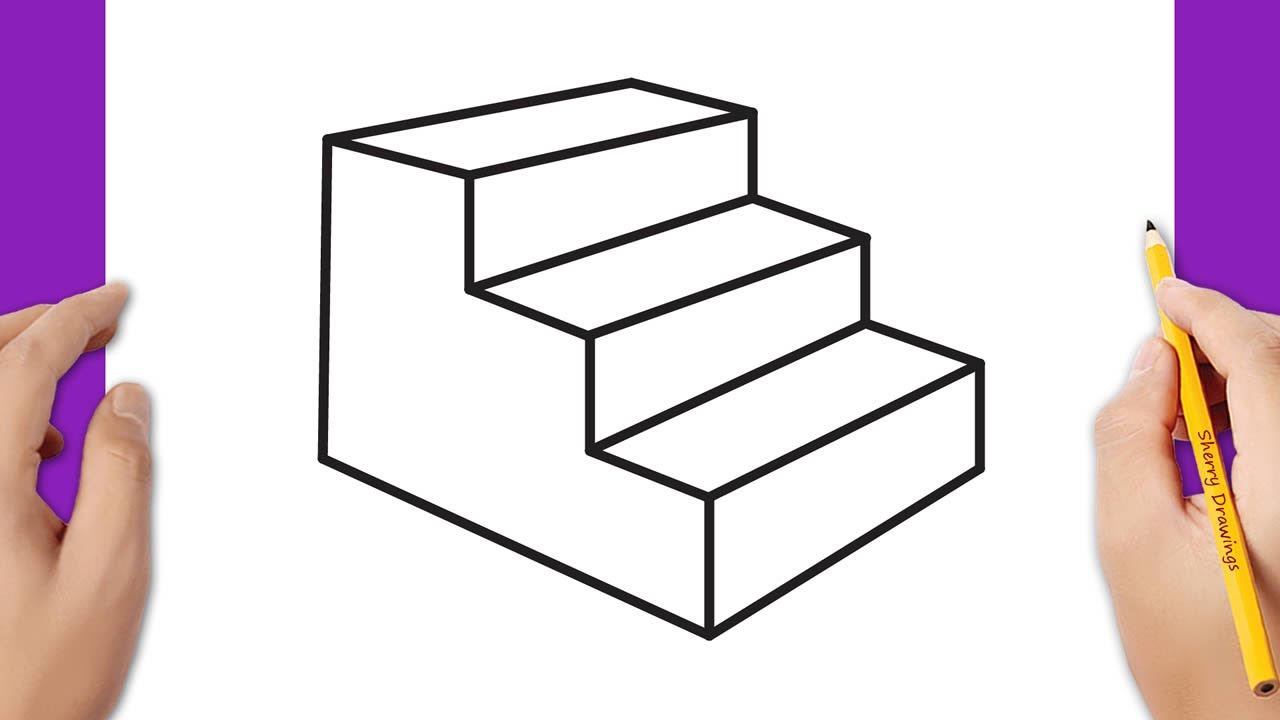
How To Draw Stairs Step By - Youtube

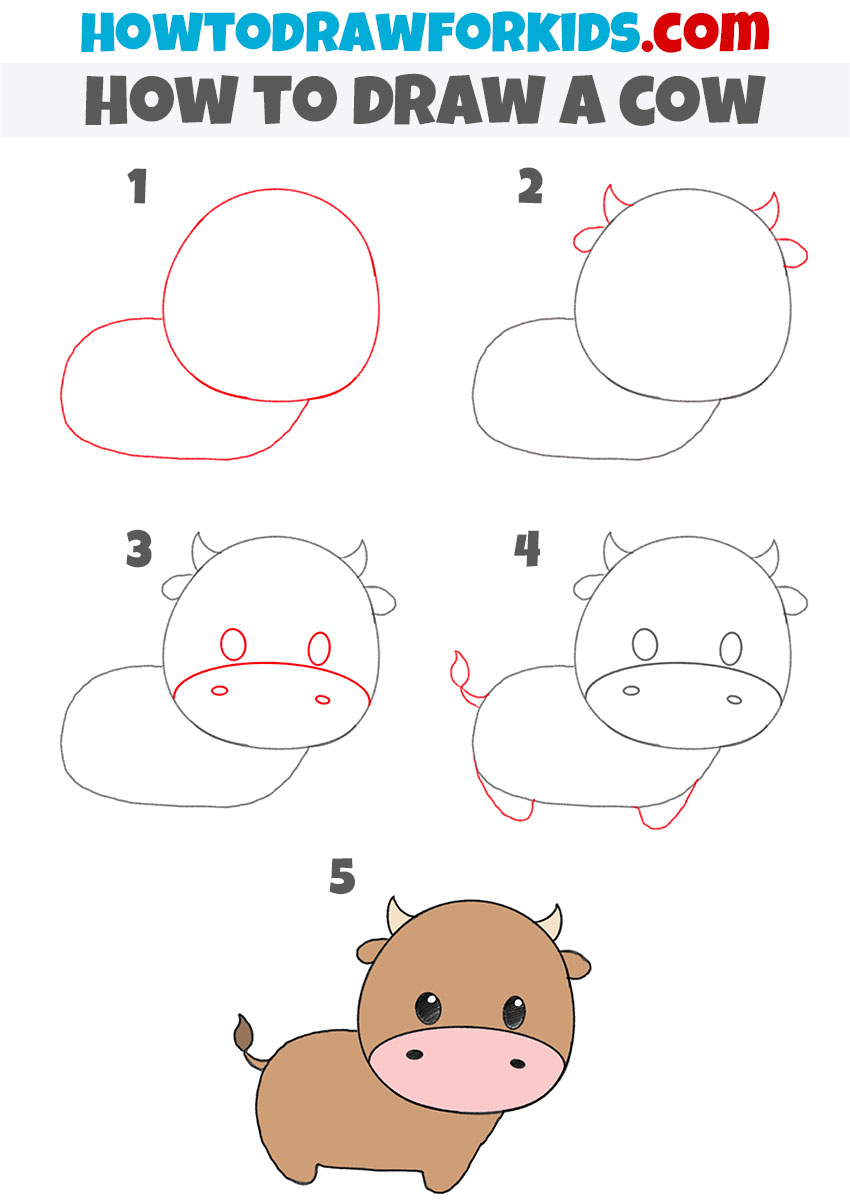
How To Draw A Puppy (step By Step) - Helloartsy

How To Draw: Step-by-step Drawing Tutorial: (beginner Books): Afrina, Mohsina: 9798551931461: Amazon.com: Books
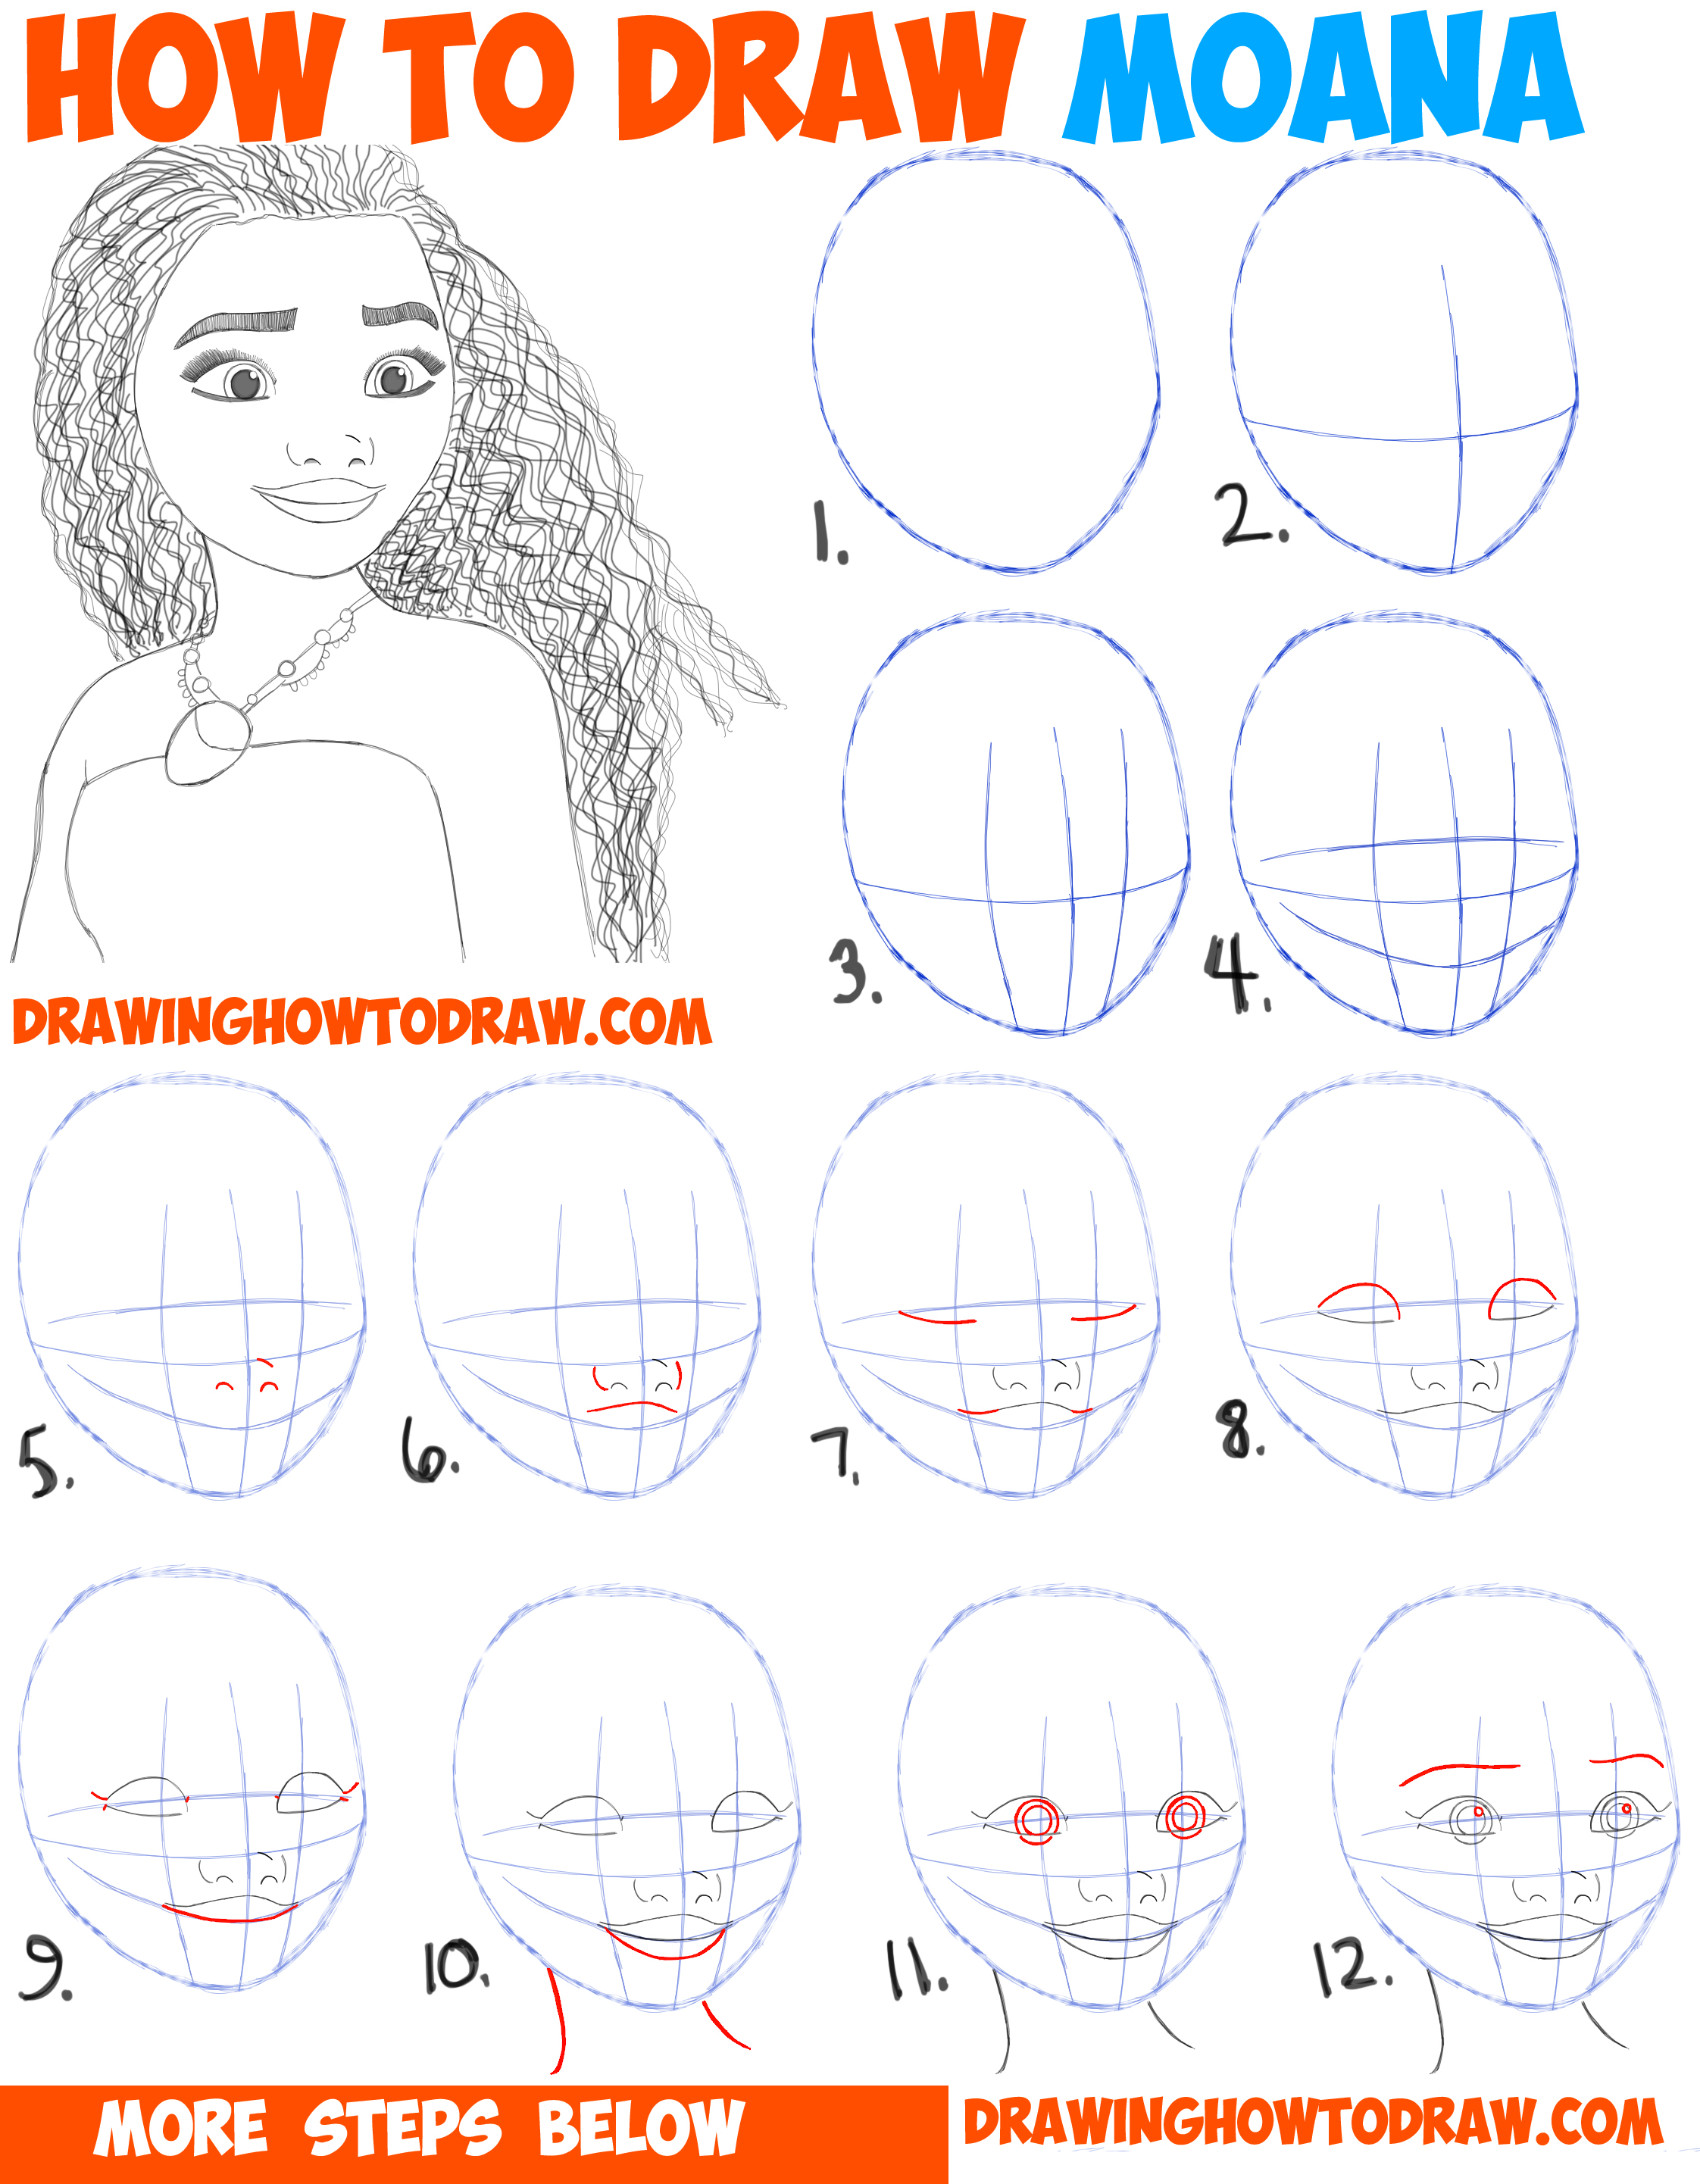
How To Draw Moana Easy Step By Drawing Tutorial For Kids And Beginners - Tutorials
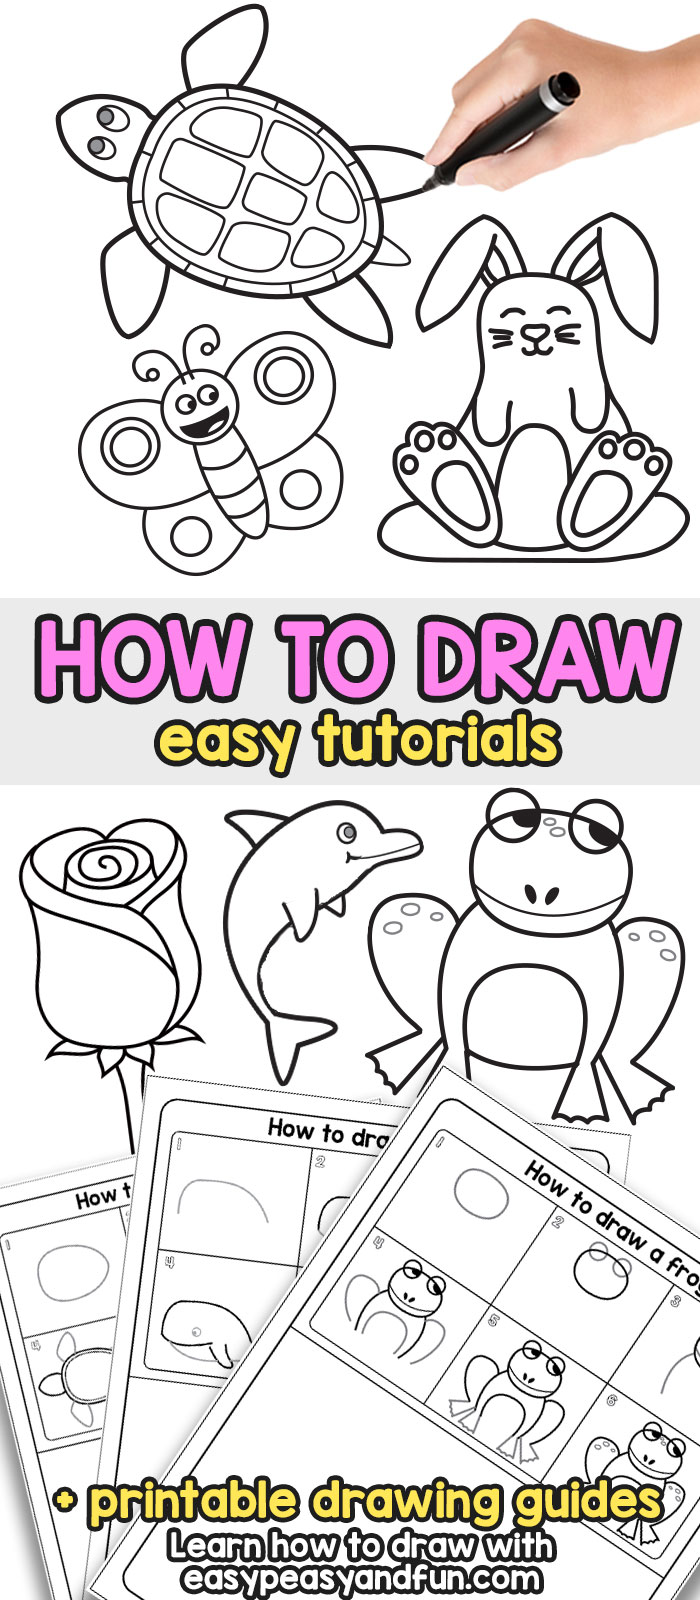
How To Draw - Step By Drawing For Kids And Beginners Easy Peasy Fun

4 Ways To Draw - Wikihow
Designing your superhero’s image 1.
How to draw by steps. Before you add the amusing facial traits, you should first. Create the face structure and neck. Using a ruler, draw a horizontal line at the top and bottom of your.
On the top of the first line draw a deep half curve with a flat top. While you’re learning to draw poses, all you need are basic drawing materials such. Make a collar and tie.
Next we will add a bit more detail to define the tops and bottoms of the fruit. You only need basic materials to learn how to draw body poses. It also includes a collection of weapons in classified by level of difficulty.
These can always be erased if you’re unhappy with them, or if a mark. This step is red in the following image. Draw some indented lines on the bottoms of both of them and another indented line on the top of the.
Take a paper and pencil and choose which. Next, sketch a heart connected to the swirl. Pick a point on your object and — very slowly and carefully, while looking at your object a lot — start to sketch simple lines and curves of the object.
Then on the second line draw a sleek flat oval, it will depict the flower bud. Let us now begin to add some more realistic definitions to our drawing of a table, starting with the legs. If drawing is your passion, following these three steps will help you become the best artist you can.
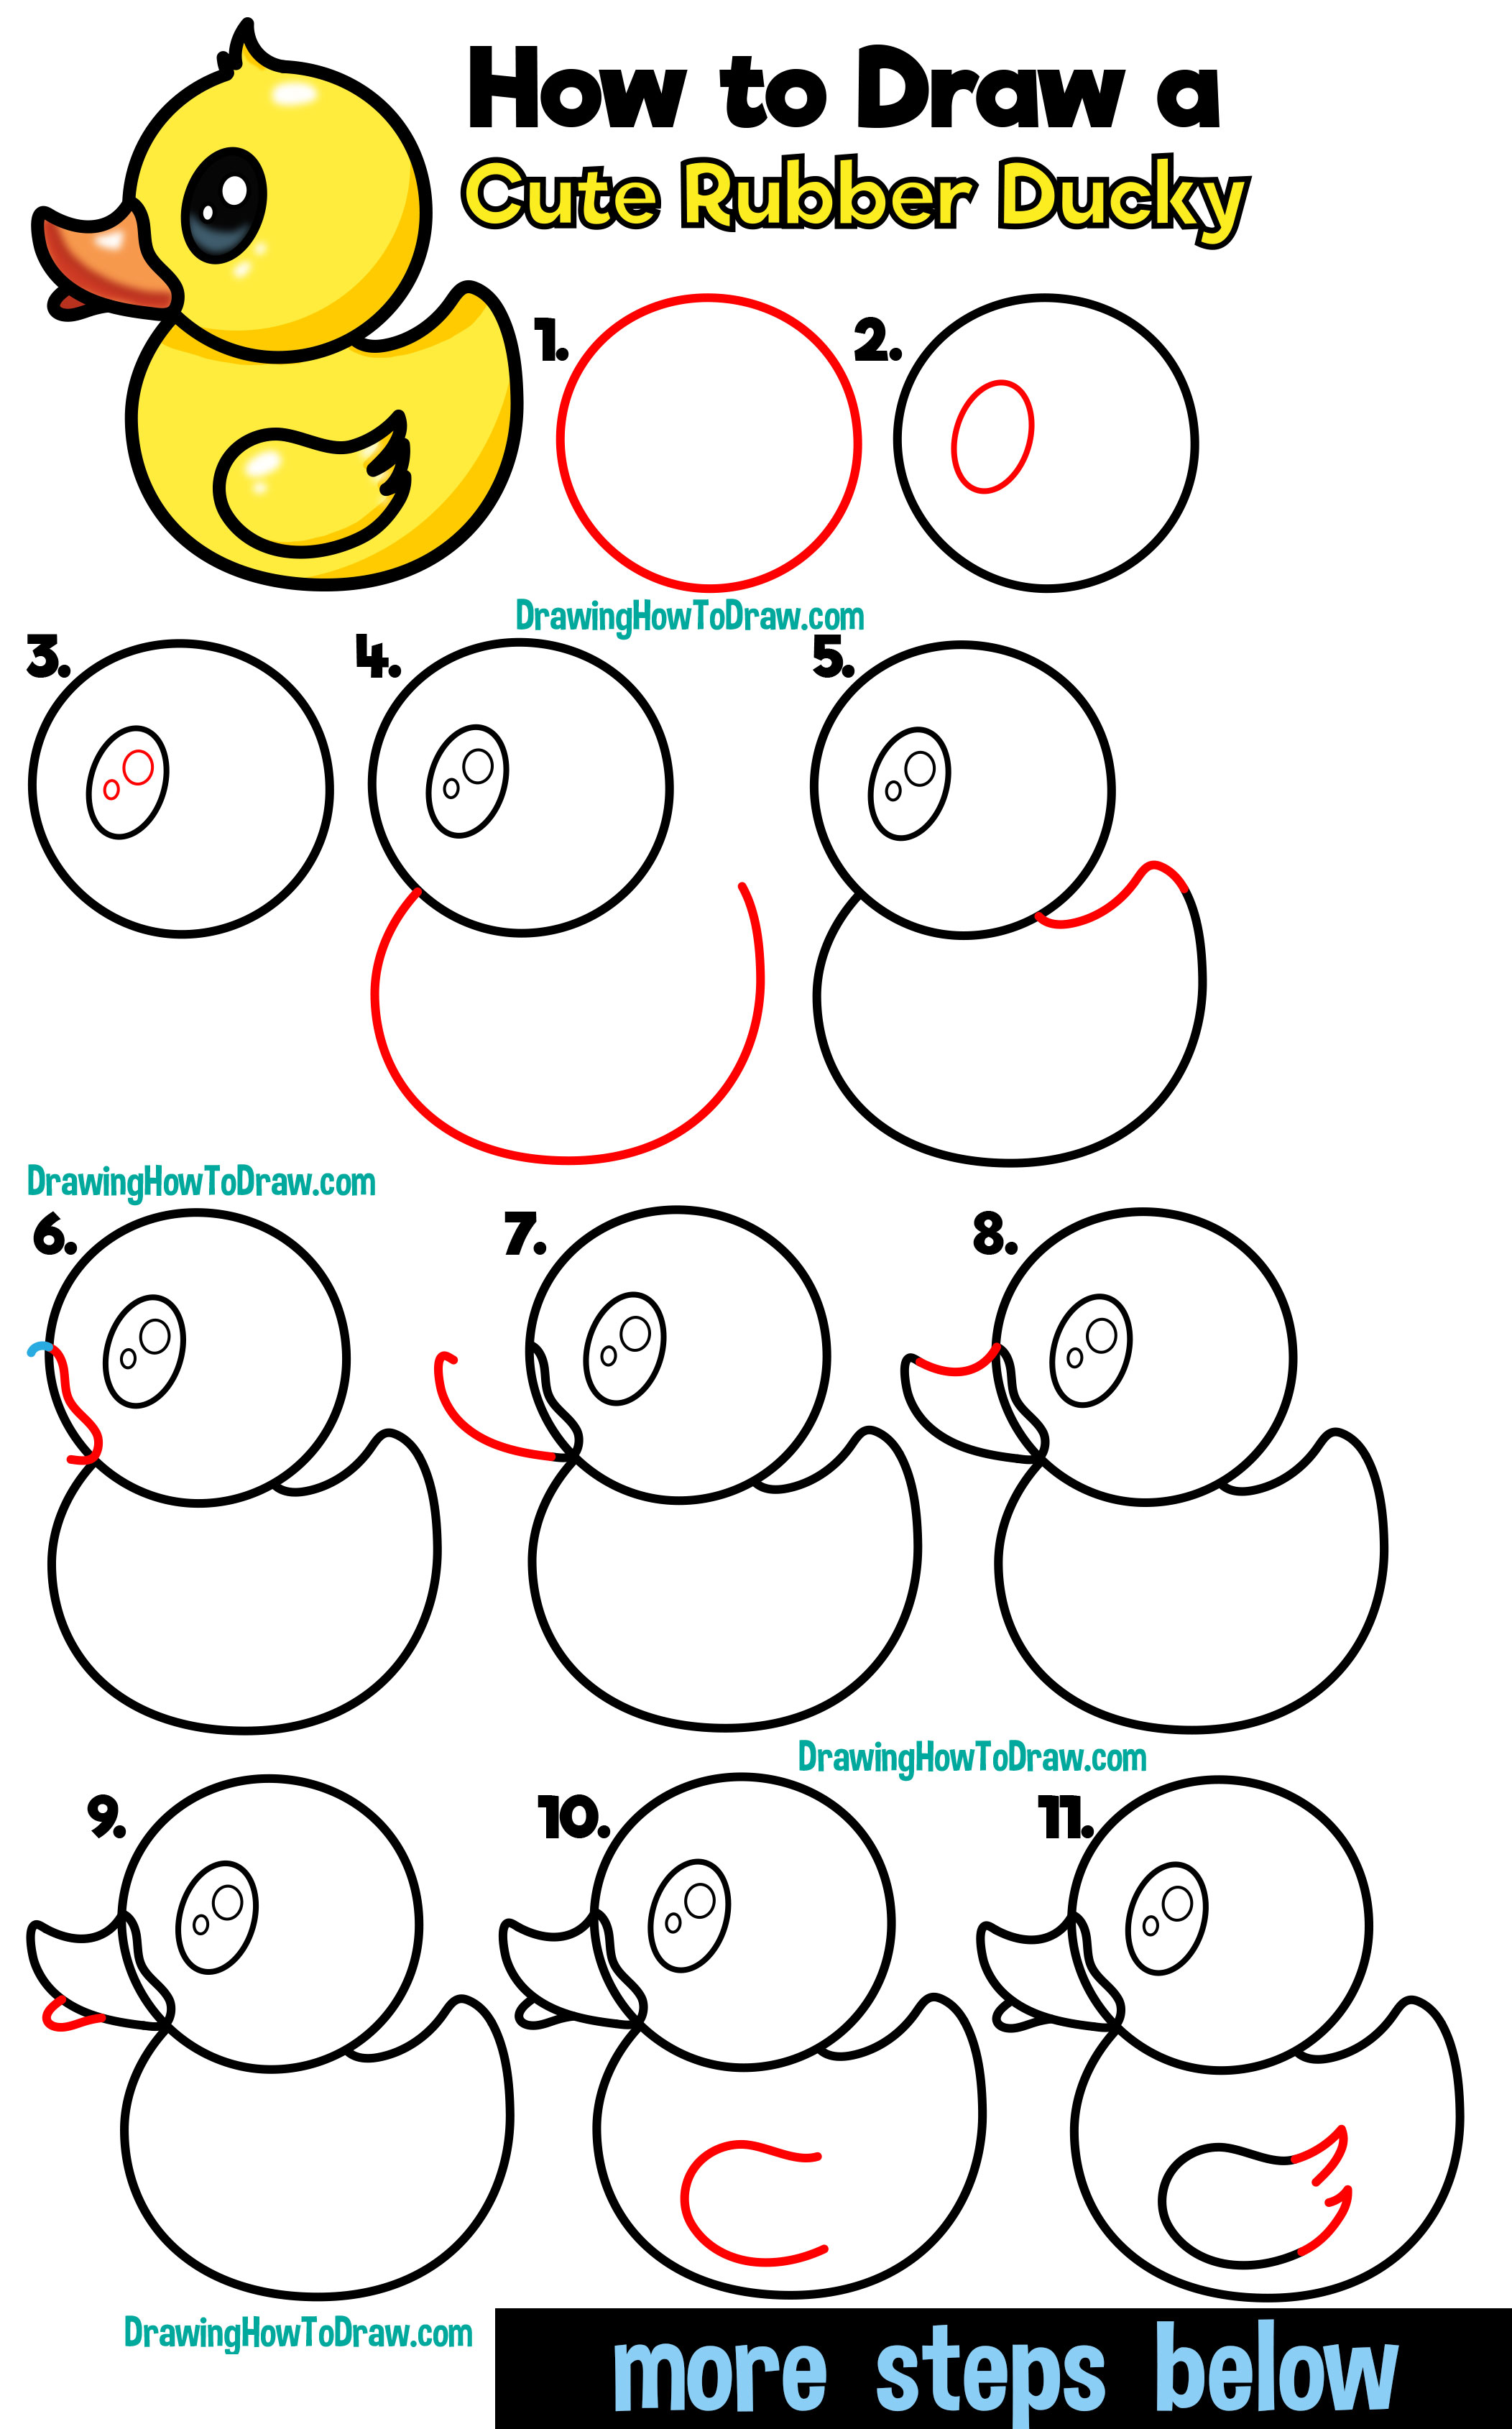
How To Draw A Cute Cartoon Rubber Ducky Easy Step By Drawing For Kids - Tutorials

How To Draw Heart Hands In Easy Follow Step By Drawing Tutorial For Beginners And Intermediates - Tutorials | Drawing,

How To Draw A Horse - Easy Drawing Tutorial For Kids

Step By - How To Draw A Cupcake | Crafting Goodness Easy Drawings, Doodle Drawings

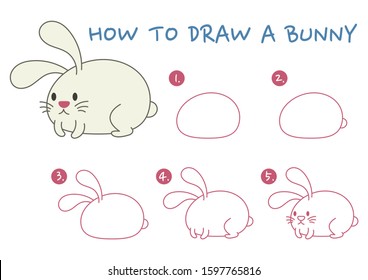
Bunny Drawing Step By Kids | Woo! Jr. Activities : Children's Publishing
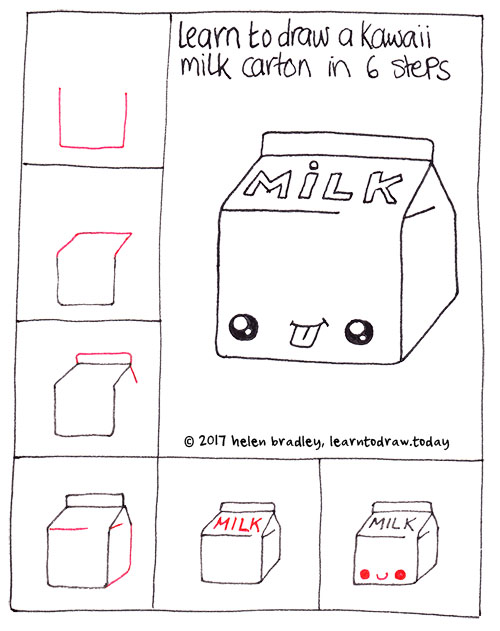
How To Draw A Kawaii Milk Carton In Six Steps : Learn

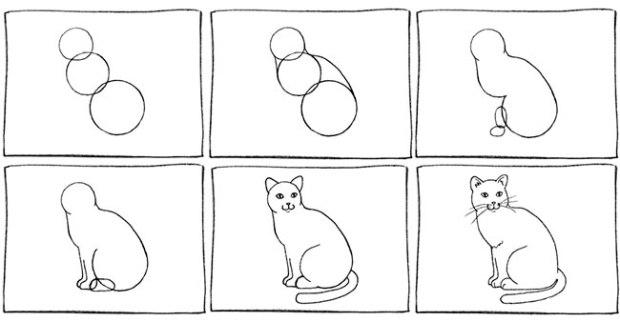
How To Draw A Realistic Cat Step-by-step - Udemy Blog

How To Draw In Six Steps - The New York Times

How To Draw A Dog Step By - Easylinedrawing
51,571 Steps Drawing Images, Stock Photos & Vectors | Shutterstock
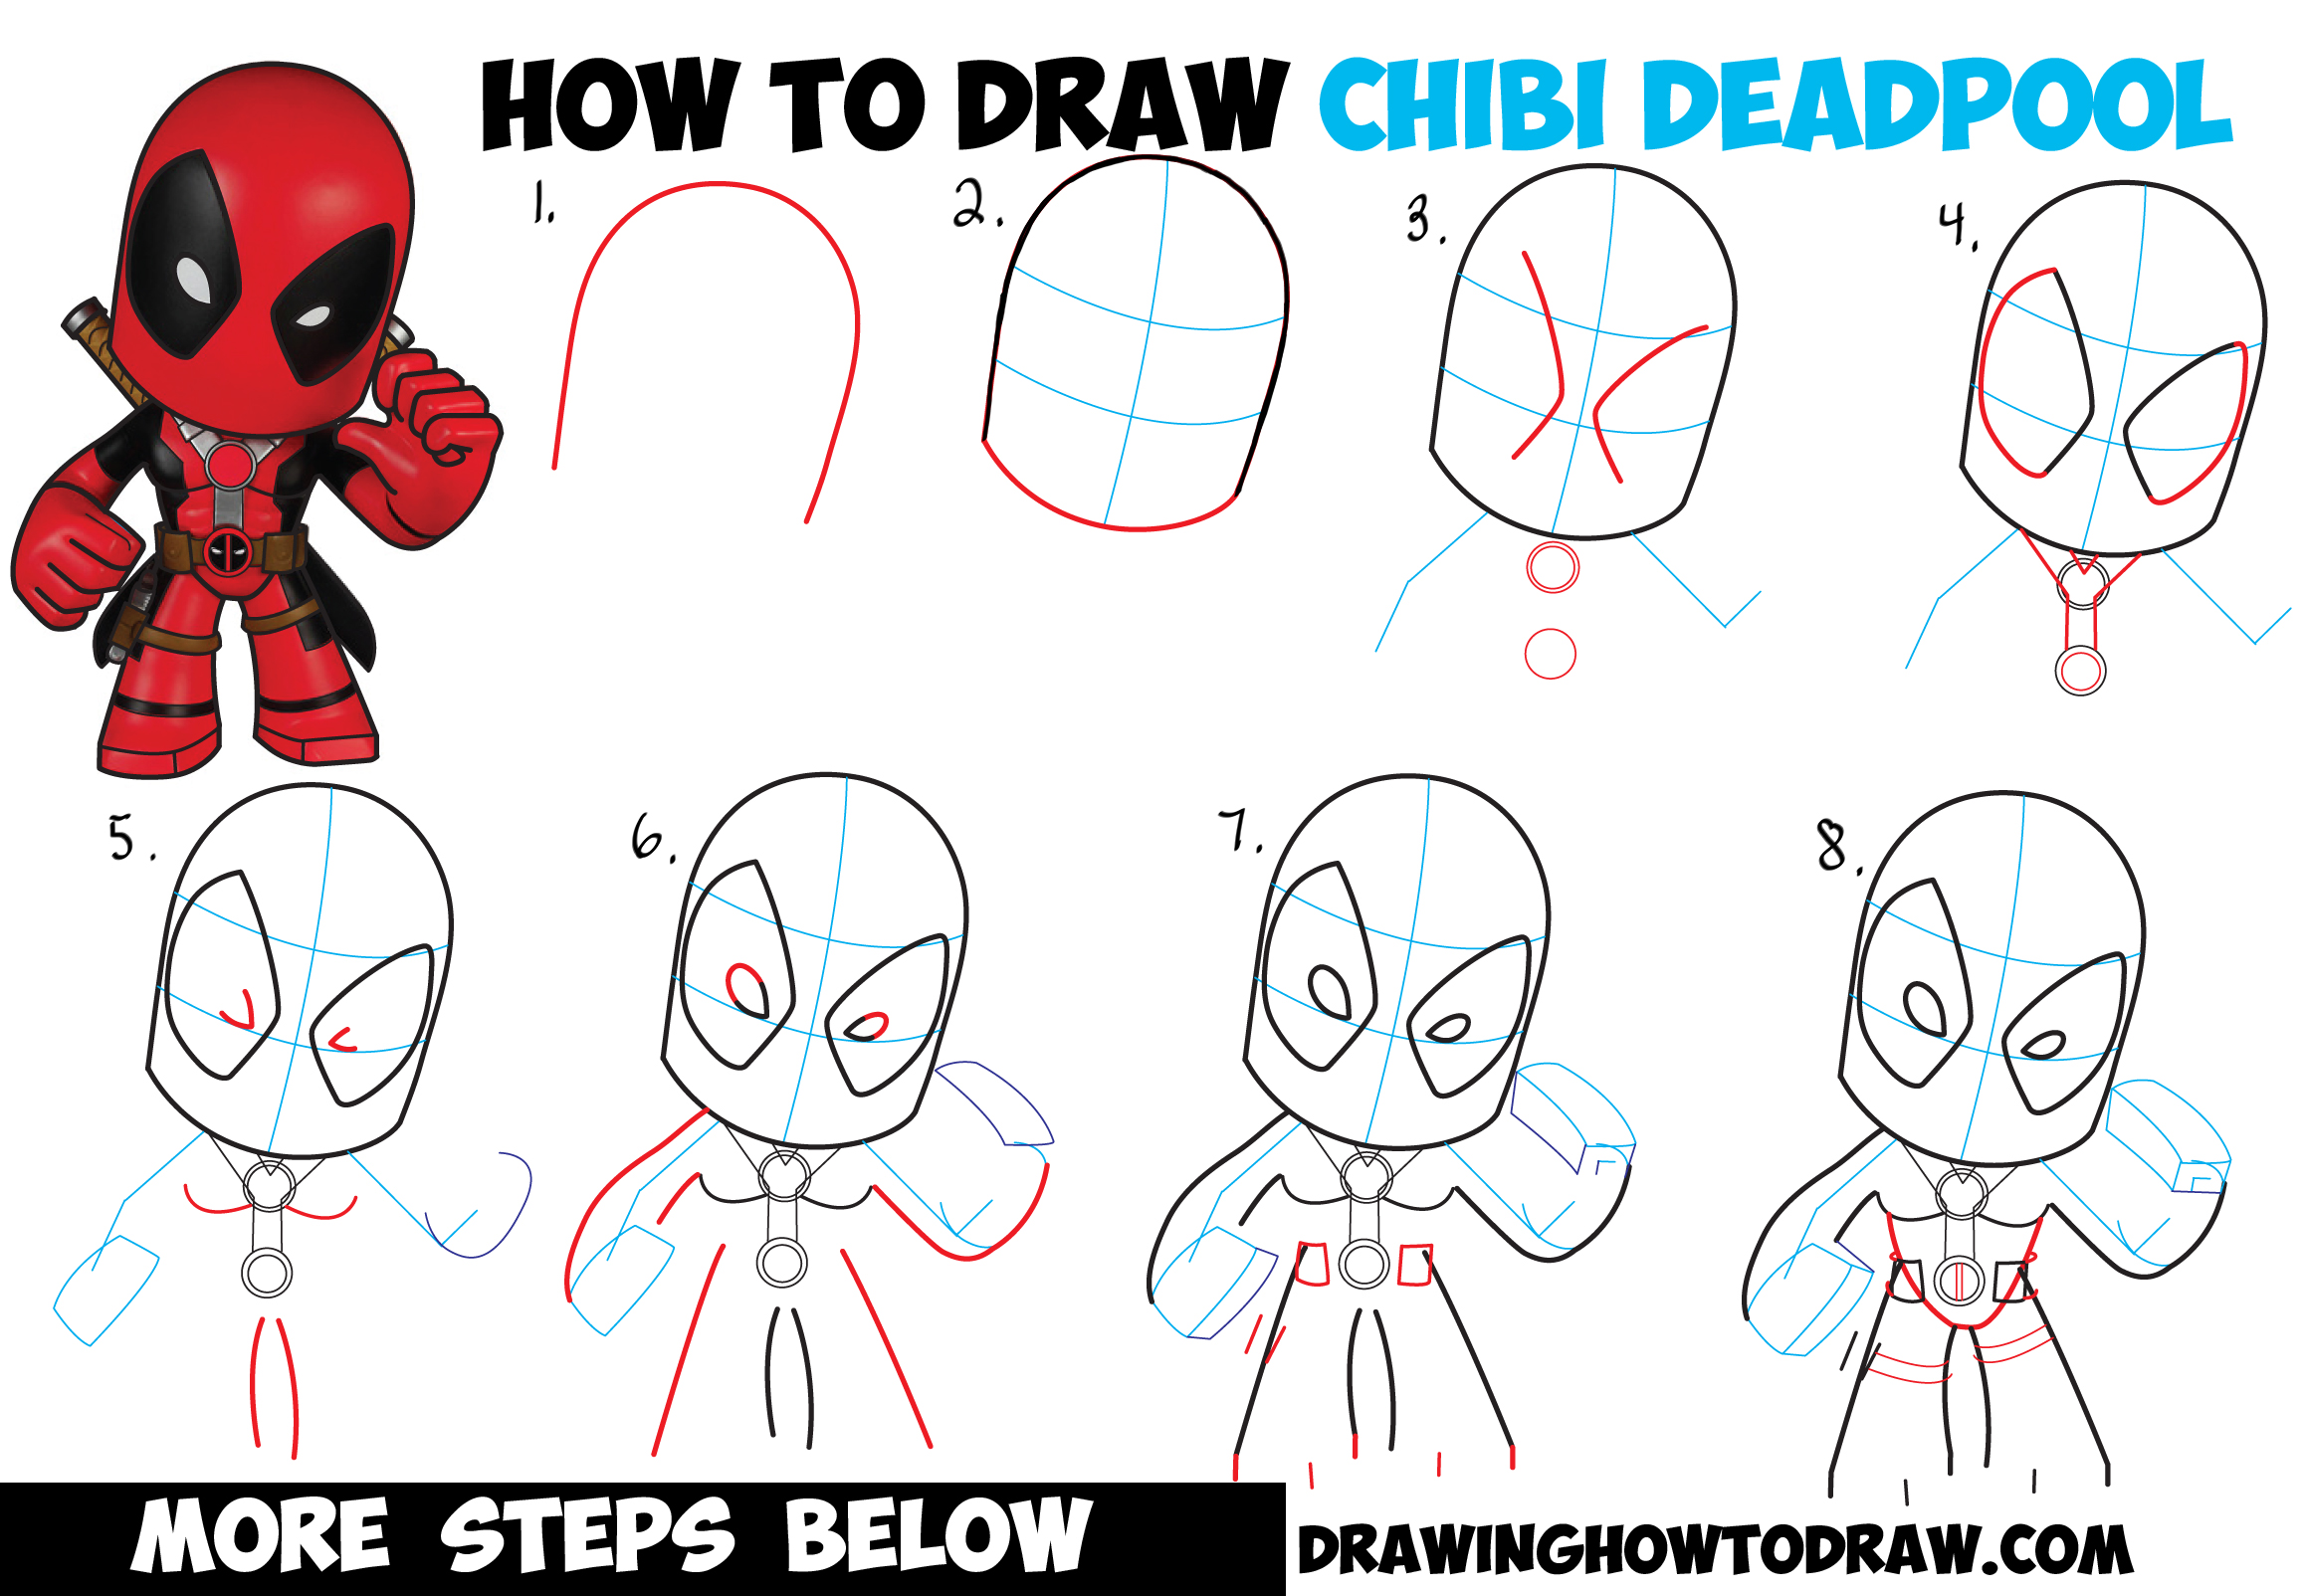
How To Draw Chibi Deadpool Easy Step By Drawing Tutorial - Tutorials

How To Draw An Ear Step By - Side View